-
06 Dec
An introduction to smartphone game development with motion-game
(This is a guest post from Nicolas Le Chenic, software developer at Synbioz. Synbioz is a French company doing Web and mobile applications using Ruby.)
RubyMotion introduced last September a 2D game development platform for iOS and Android called motion-game. Until then creating games was done using the Joybox gem, which hasn't been maintained for a while. From now on RubyMotion includes a beta version of motion-game which will be maintained, up to date, easy to set up and cross-platform!
In this article we will discover motion-game and I'm pretty sure that you'll want to try it to build smartphone games!
Hello world
First of all you need to install motion-game.
gem install motion-gameAs you can see it is really easy. Now we can create our first hello world game.
motion create --template=motion-game hello
cd hello
The project is created with few files which makes it easy to handle.
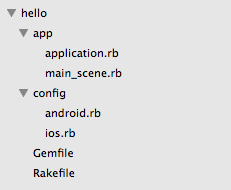
In this introduction we will have a look at the
appfolder in which we will develop a minimalistic game.app/application.rb
class Application < MG::Application
  def start
    MG::Director.shared.run(MainScene.new)
  end
end
app/main_scene.rb
class MainScene < MG::Scene
  def initialize
    label = MG::Text.new("Hello World", "Arial", 96)
    label.anchor_point = [0, 0]
    add label
  end
end
By default, all files in
appare loaded by RubyMotion. The entry point and the scene files where the game takes place are namedapplication.rbandmain_scene.rbrespectively. The application file launches the main scene (a simple "Hello World") with some basic functionality like setting the font style and the anchor point of a label. Now we can simulate our game on iOS and Android!rake ios:simulator rake android:emulatorOnce started you should see "Hello World" appearing.

As you can see, it is very easy to create an iOS and Android game with one code only! We can carry on by applying other methods on our label.
app/main_scene.rb
  def initialize
    label = MG::Text.new("Hello World", "Arial", 96)
    label.position = [400, 400]
    label.color = [0, 0.6, 0.8]
    label.rotation = -10.0

    add label
  end
The
positionmethod allows us to move the label relatively to its center. Then we change the color and apply a rotation.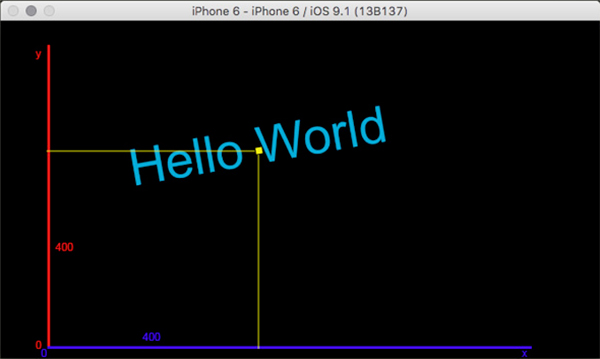
Synbioz vs Zombie
We go on by creating a mini game, as an excuse to explore other features. There is already an example of Flappy Bird provided by the RubyMotion team that you should really download.
Our mini game is less elaborated but will allow us to discover interesting methods of the framework.
The game
The goal of our game, "Synbioz vs Zombie", is quite simple. You play a survivor of a team which should dodge a zombie as long as possible. Before you start you will need to retrieve images and audio resources on github.
First step
To create our game we will need the following scenes:
- Survivor choice (
survivor_scene.rb) - Main (
main_scene.rb) - Game over (
game_over_scene.rb)
It's time to create our project!
motion create --template=motion-game synbiozvszombie
cd synbiozvszombie
In the
appfolder we'll add ascenessubfolder that will include the three scene files. You'll have to removemain_scene.rbfrom theapproot to prevent conflicts at runtime.Choose your survivor
The first scene will allow us to select the Synbioz team survivor that you want to embody in the game.
app/application.rb
class Application < MG::Application
  def start
    MG::Director.shared.run(SurvivorScene.new)
  end
end
Now the game begins on the survivor scene.
app/scenes/survivor_scene.rb
class SurvivorScene < MG::Scene
  def initialize
    add_label
  end

  def add_label
    label = MG::Text.new("Choose your survivor", "Arial", 80)
    label.color = [0.7, 0.7, 0.7]
    label.position = [MG::Director.shared.size.width / 2, MG::Director.shared.size.height - 100]

    add label
  end
end
In the first scene, we add a text label. Under this label we will have the opportunity to choose the survivor.
MG::Director.shared.size.widthallows us to get the screen width. Once halved, the text will be centered onx. Finally we add 100px on the top of the screen to improve the rendering.Now we add our survivor list :
app/scenes/survivor_scene.rb
def add_survivors
  team_synbioz = ["Martin", "Nico", "Victor", "Jon", "Numa", "Clement", "Theo", "Cedric"]

  team_synbioz.each_with_index do |name, index|
    button = MG::Button.new("#{name}")
    button.font_size = 35
    button.position = [MG::Director.shared.size.width / 2, (MG::Director.shared.size.height - 200) - (index * 50)]
    button.on_touch { MG::Director.shared.replace(MainScene.new(name)) }

    add button
  end
end
We added a button for each member of Synbioz. Once selected, we have to replace the current scene by the main one with
MG::Director.shared.replace()where the scene takes thenameas a parameter. You should see that :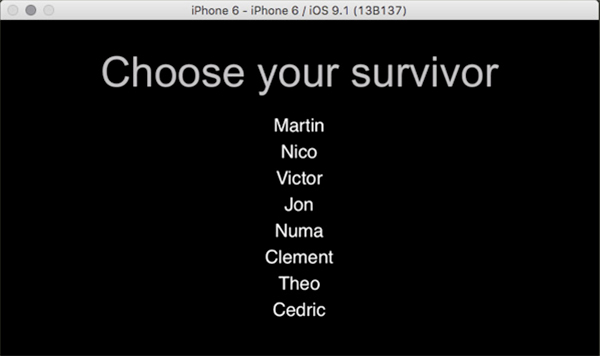
Main scene, the real fun begins!
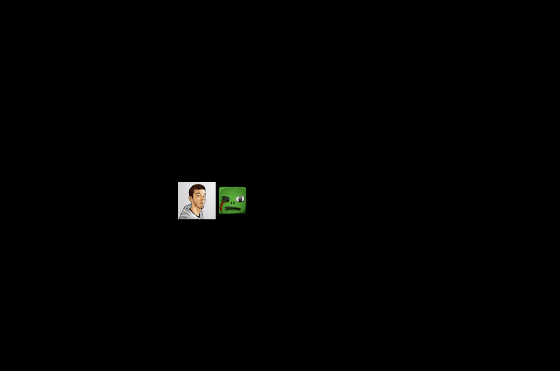
The main scene will include two elements, a survivor and a zombie. The latter will move randomly on the screen and you'll have to move the survivor by yourself.
Resources
We then need resources. By default, motion-game find the resources in the folder with the name
resourcesin the project root. So you just have to create this folder and add the downloaded resources.app/scenes/main_scene.rb
  def initialize(name)
    add_zombie
  end

  def add_zombie
    @zombie = MG::Sprite.new("zombie.png")
    @zombie.position = [400, MG::Director.shared.size.height / 2]

    add @zombie
  end
Right now
MG::Sprite.new("image")gets images on which we can apply some methods. It's just as easy to play a sound from this folderMG::Audio.play("song").app/scenes/main_scene.rb
  def initialize(name)
    MG::Audio.play("night.wav", true, 0.5)
    @name = name.downcase

    add_zombie
  end
This song will be played at launch. In order to loop it, you need to set the
playsecond argument totrue. Finally0.5is the volume. Next, we import the survivor image stored in the folderresources/survivors. We save the name into the@nameinstance variable which is useful to display the survivor image dynamically.app/scenes/main_scene.rb
  def initialize(name)
    MG::Audio.play("night.wav", true, 0.5)
    @name = name.downcase

    add_zombie
    add_survivor
  end

  def add_survivor
    @survivor = MG::Sprite.new("survivors/#{@name}.jpg")
    @survivor.position = [100, MG::Director.shared.size.height / 2]

    add @survivor
  end
Once your choice is made you are redirected to the main scene.

Physical objects
We want to launch the game over scene when our characters are in contact. First we will move our survivor to the zombie to see what happens.
app/scenes/main_scene.rb
  def initialize(name)
    MG::Audio.play("night.wav", true, 0.5)
    @name = name.downcase

    add_zombie
    add_survivor
  end

  def add_survivor
    @survivor = MG::Sprite.new("survivors/#{@name}.jpg")
    @survivor.position = [100, MG::Director.shared.size.height / 2]
    @survivor.move_to([450, @survivor.position.y], 1)

    add @survivor
  end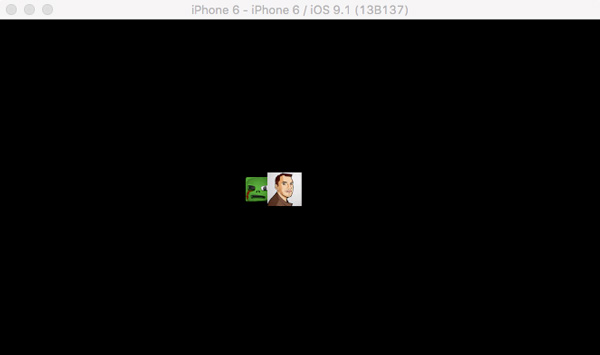
For the moment our survivor runs through the zombie, both behave as images. We want physical contact between images to be possible.
app/scenes/main_scene.rb
  def add_zombie
    @zombie = MG::Sprite.new("zombie.png")
    @zombie.attach_physics_box
    @zombie.position = [400, MG::Director.shared.size.height / 2]

    add @zombie
  end

  def add_survivor
    y_position = MG::Director.shared.size.height / 2

    @survivor = MG::Sprite.new("survivors/#{@name}.jpg")
    @survivor.attach_physics_box
    @survivor.position = [100, y_position]
    @survivor.move_to([450, y_position], 1)

    add @survivor
  end
Click on the image below to see the animation.
Now we have a collision between the survivor and zombie! We also note that our characters are experiencing gravity which is very interesting for a 2D Mario like game for example.
Our mini game is closer to a Pacman, so we will remove this feature.
app/scenes/main_scene.rb
  def initialize(name)
    self.gravity = [0, 0]

    MG::Audio.play("night.wav", true, 0.5)
    @name = name.downcase

    add_zombie
    add_survivor
  end
Now that our characters behave as expected, the remaining part is to trigger our game over scene on contact. For this we use the
contact_mask.app/scenes/main_scene.rb
def initialize(name) self.gravity = [0, 0] MG::Audio.play("night.wav", true, 0.5) @name = name.downcase add_zombie add_survivor on_contact_begin do MG::Director.shared.replace(GameOverScene.new) end end def add_zombie @zombie = MG::Sprite.new("zombie.png") @zombie.attach_physics_box @zombie.position = [400, MG::Director.shared.size.height / 2] @zombie.contact_mask = 1 add @zombie end def add_survivor y_position = MG::Director.shared.size.height / 2 @survivor = MG::Sprite.new("survivors/#{@name}.jpg") @survivor.attach_physics_box @survivor.position = [100, y_position] @survivor.contact_mask = 1 @survivor.move_to([450, y_position], 1) add @survivor endapp/scenes/gameoverscene.rb
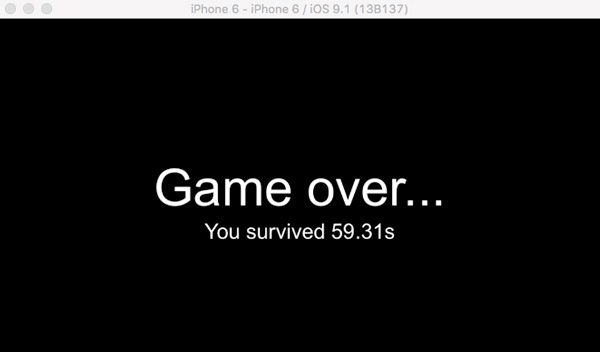
class GameOverScene < MG::Scene
  def initialize
    add_label
  end

  def add_label
    label = MG::Text.new("Game over...", "Arial", 96)
    label.position = [MG::Director.shared.size.width / 2, MG::Director.shared.size.height / 2]
    add label
  end
end
Now when our survivor touches the zombie, the
on_contact_beginblock is called and replaces our stage by the game over screen!The movements
Now we want to move the characters. The survivor will move to the position touched on the screen and the zombie will move randomly within the limits of the screen.
Events movements
First we will move our survivor. For this we need to get the contact details that will be used in
@survivor.move_to([x, y], 1).app/scenes/main_scene.rb
def initialize(name)
  self.gravity = [0, 0]

  @name = name.downcase

  add_survivor
  add_zombie

  on_touch_begin do |touch|
    @survivor.move_to([touch.location.x, touch.location.y], 1)
  end

  on_contact_begin do
    MG::Director.shared.replace(GameOverScene.new(@score))
  end
end
The
on_touch_beginblock allows us to find the coordinates of our finger during the touch event. This will replace the previousmove_to.Random movements
With the
#updatemethod, motion-game includes an easy-to-implement loop system. You just need to define theupdate(delta)method that you can easily switch on and off with thestart_updateandstop_updatemethods.app/scenes/main_scene.rb
  def initialize(name)
    self.gravity = [0, 0]

    @name = name.downcase
    @zombie_update_position = 0

    # CODE ...

    start_update
  end

  def update(delta)

    @zombie_update_position += delta

    if @zombie_update_position >= 2.0
      @zombie.move_to([random_position[:x], random_position[:y]], 1)
      @zombie_update_position = 0
    end
  end

  private
  def random_position
    {
      x: Random.new.rand(0..MG::Director.shared.size.width),
      y: Random.new.rand(0..MG::Director.shared.size.height)
    }
  end
First we initialize
@zombie_update_positionto zero, then we start the loop withstart_update. Theupdatemethod has adeltaparameter which is the execution time of the loop. Thus, we can get the current time by incrementing withdelta. We use this principle to move the zombie every two seconds. Then we specify some random coordinates that stay within the dimensions of the screen to manage the zombie movement.Add some fun
To add some fun, we will change the scale of the zombie every two seconds, then we will show the survival time on the game over screen.
app/scenes/main_scene.rb
def initialize(name)
  self.gravity = [0, 0]

  @name = name.downcase
  @time = 0
  @zombie_update_position = 0

  add_survivor
  add_zombie

  on_touch_begin do |touch|
    @survivor.move_to([touch.location.x, touch.location.y], 2)
  end

  on_contact_begin do
    MG::Director.shared.replace(GameOverScene.new(@time))
  end

  start_update
end

def add_zombie
  # CODE ...
end

def add_survivor
  # CODE ...
end

def update(delta)

  @time += delta
  @zombie_update_position += delta

  if @zombie_update_position >= 2.0
    @zombie.move_to([random_position[:x], random_position[:y]], 1)
    @zombie.scale += 0.1
    @zombie_update_position = 0
  end
end

private
def random_position
  {
    x: Random.new.rand(0..MG::Director.shared.size.width),
    y: Random.new.rand(0..MG::Director.shared.size.height)
  }
end
We use
@timevariable to send the score to the game over scene.app/scenes/gameoverscene.rb
class GameOverScene < MG::Scene
  def initialize(score)
    add_label
    add_score(score)
  end

  def add_label
    label = MG::Text.new("Game over...", "Arial", 96)
    label.position = [MG::Director.shared.size.width / 2, MG::Director.shared.size.height / 2]
    add label
  end

  def add_score(score)
    time = score.round(2)
    score = MG::Text.new("You survived #{time}s", "Arial", 40)
    score.position = [MG::Director.shared.size.width / 2, (MG::Director.shared.size.height / 2) - 80]

    add score
  end
end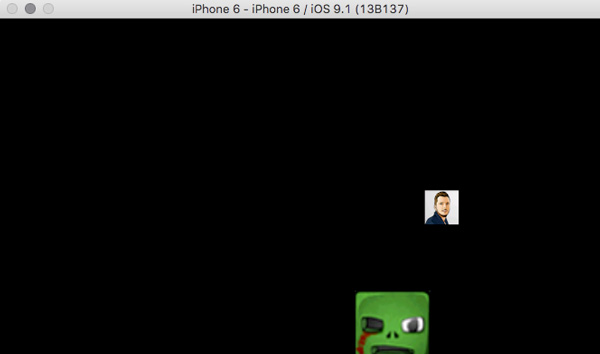
Conclusion
With this introduction we had an overview of many motion-game features. If you're interested in, I would strongly recommend that you take a look at the documentation. Other articles are to come and will go into more details!
- Survivor choice (