Creating Apple Watch applications
1. Creating a new WatchOS 2.0 app
Apple Watch applications are created as part of iOS applications. If you dont know how to create iOS applications with RubyMotion, please read the Getting Started guide. If you have your iOS application ready, let’s start.
To create the basic structure of our watchOS application, run the following command in the parent’s app directory:
$ motion create my_watch_app --template=ios-watch-appNext, we need to inform the parent application that it has a new watchOS app. We do this by adding the following to its Rakefile:
app.target "my_watch_app", :watchapp2. Building the interface
Since there is no way to create views in code, the interface of watchOS applications must be created via Interface Builder, inside Xcode. But don’t worry! This process is made very easy thanks to a gem called ib.
To install it, cd into the watchOS app directory and run bundle
$ cd my_watch_app
$ bundle
This gem acts as a bridge between our Ruby code and Xcode, making it very easy to declare your views in code and link them to elements in Interface Builder.
Let’s open our main interface controller in my_watch_app/app/interface_controller.rb, and add a label:
class InterfaceController < WKInterfaceController
  extend IB

  outlet :hello_world, WKInterfaceLabel

  # ...
end
Notice how we have to add extend IB to every class where we want to define Interface Builder outlets.
Interface elements created in Interface Builder are referenced in code via outlets.
Each outlet is defined with a symbol and the class of the outlet.
Next, we will edit the text inside our label:
def awakeWithContext(context)
  super
  @hello_world.text = "hello!"
  self
end
We still need to create our interface elements. Let’s use ib to open Xcode:
$ cd my_watch_app
$ rake ib
After this, Xcode will open. Navigate the file structure on the left side and open Interface.storyboard inside Resources > watch_app
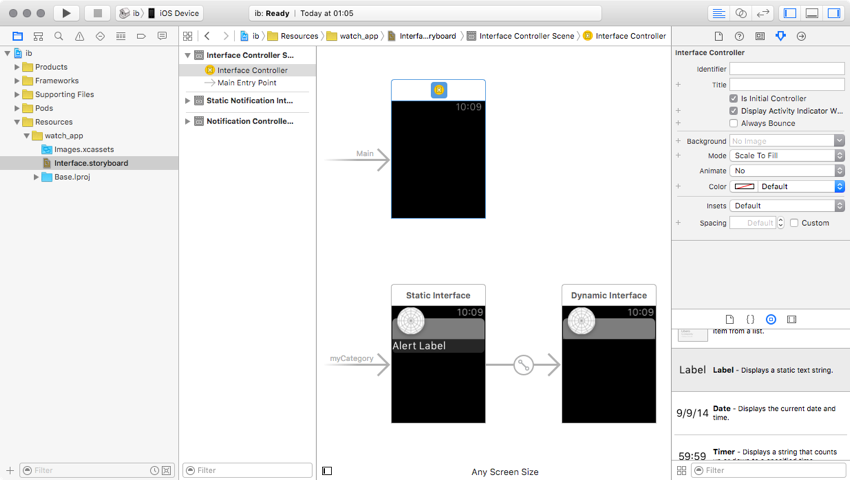
You will see three black boxes. We will focus on the first one, which represents the main interface of the watch application.
The available interface elements are listed in the bottom right. Let’s drag a label element to the main interface controller:
Then, right-click on 'Interface Controller' in the column on the left of the label element. A window will pop up, and you will see hello_world listed under Outlets. Grab the the circle on the right of hello_world and drag it to our label element.
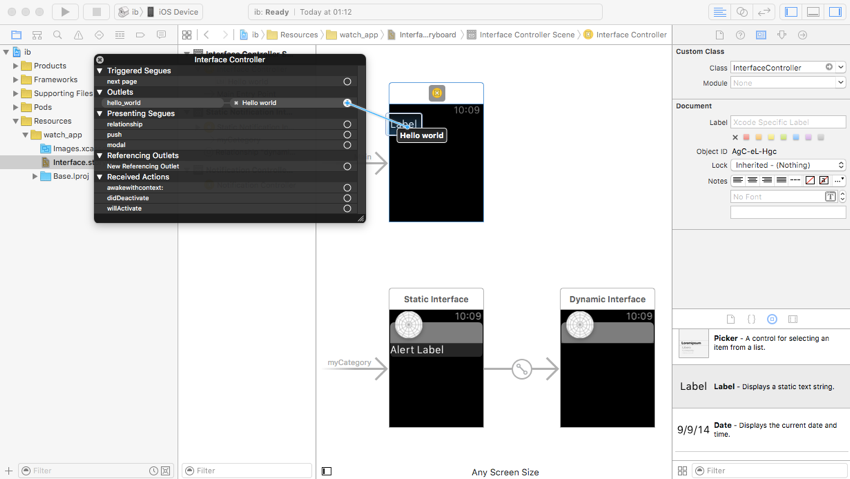
Congrats! The outlet you created in code has been linked to the label you created in Interface Builder.
3. Running your application
Running the application in the watchOS simulator is very easy. Simply run the following command from the parent application’s directory:
$ rake watchBoth the iOS and the watchOS simulators will launch, and your application will open inside a debugger session.
4. Testing on a device
To test your application on a device, simply install the parent application via rake device. Using the system Watch app, you can install watchOS applications in your Apple Watch.
5. Appstore distribution
In the Provisioning Portal, we will create 3 app IDs, and their corresponding provisioning profiles (either for distribution or development).
The 3 bundle indentifiers must conform to the following structure:
-
Parent app: com.mycompany.my_app
-
WatchKit extension: com.mycompany.my_app.watchkitextension
-
Watch app: com.mycompany.my_app.watchapp
After downloading them, we will configure our app. First, in the parent app’s Rakefile:
app.codesign_certificate = 'My Codesign Certificate'
app.provisioning_profile = _com.mycompany.my_app.mobileprovision_
Next, in the watch app’s Rakefile:
app.codesign_certificate = 'My Codesign Certificate'
app.provisioning_profile = _com.mycompany.my_app.watchkitextension.mobileprovision_
app.watch_app_config.codesign_certificate = 'My Codesign Certificate'
app.watch_app_config.provisioning_profile = _com.mycompany.my_app.watchapp_